This guide shows you how to move your existing email — messages, folders, sent items and contacts — from your previous mail provider onto the Net3000 Managed Email Server, using Microsoft Outlook on Windows. It applies to Outlook 2016 and newer versions (Outlook 2019, 2021, and Microsoft 365 classic Outlook).
The move has three stages: (1) back up your current mailbox to a file, (2) swap the old account in Outlook for your new Net3000 mailbox, and (3) import the backup into it. Because the new mailbox uses IMAP, everything you import is uploaded to the server, so it stays in sync across your computer, phone and webmail.
Before you begin
- Use the classic Outlook desktop app on Windows — Outlook 2016 and newer. The steps and screens below match it. The “new Outlook” and webmail do not include the Import/Export tools.
- Make sure your old account is fully downloaded in Outlook before you export.
- Do not remove your old account until the backup in Part 1 has finished — the backup file is your copy of everything. Removing the account from Outlook does not delete that file, and your mail also remains on the old mail server until that service is cancelled.
Your Net3000 Managed Email settings
Outlook fills these in automatically — use them only if you are prompted to enter them.
- Incoming (IMAP): mailman.net3000.ca — port 993, SSL
- Outgoing (SMTP): mailman.net3000.ca — port 465, SSL
- POP (only if you prefer POP): mailman.net3000.ca — port 995, SSL
- User name: your full email address Password: your mailbox password
Part 1 — Back up your existing mailbox to a file
Step 1. In Outlook, click File, then Open & Export, then Import/Export.
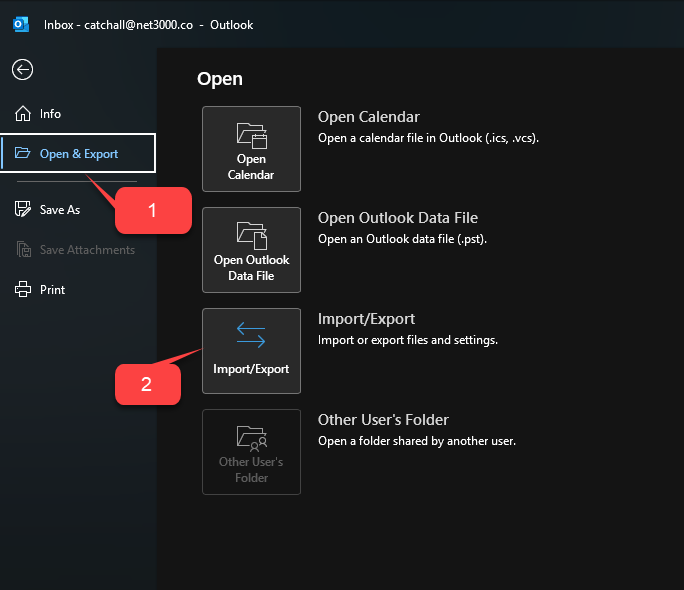
Step 2. In the Import and Export Wizard, choose Export to a file, then click Next.
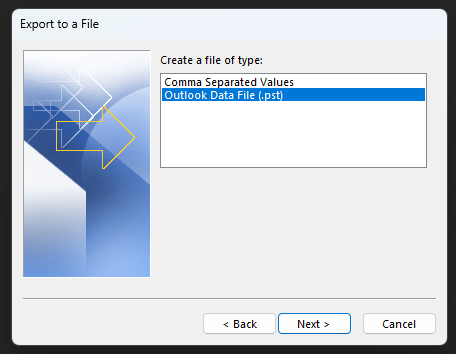
Step 3. Select Outlook Data File (.pst), then click Next.
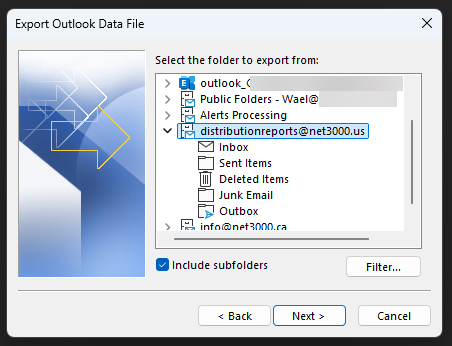
Step 4. Click your old email account at the top of the list so everything under it is included, tick Include subfolders, then click Next.
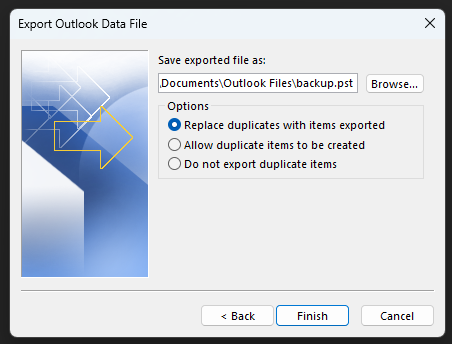
Step 5. Click Browse to choose where to save the file (for example backup.pst in your Documents), leave the default option Replace duplicates with items exported, then click Finish. If Outlook offers to add a password, leave the boxes blank and click OK. Wait for the export to finish.
Part 2 — Remove the old account and add your new Net3000 mailbox
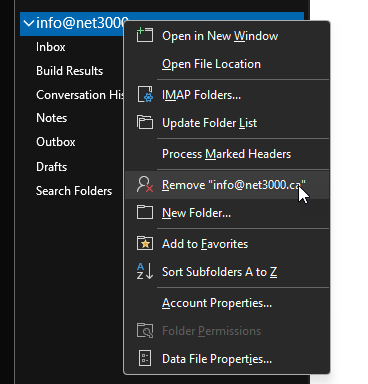
Step 6. Outlook does not allow two accounts with the same email address, so close the existing account first: right-click your old account in the folder list on the left and choose Remove, then confirm. This only removes the account from Outlook — your backup file from Part 1 is not affected, and your mail also stays on the old server.
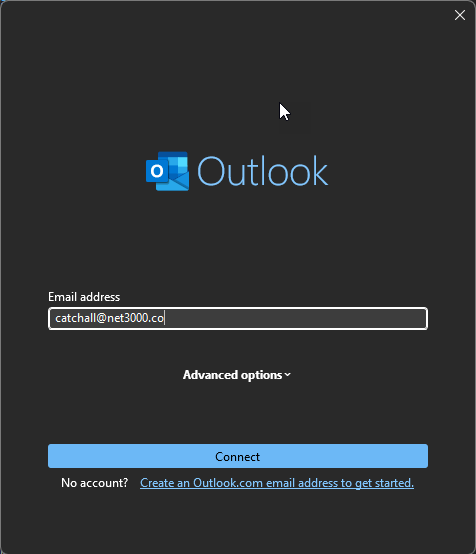
Step 7. Click File, then Add Account. Type your email address and click Connect.
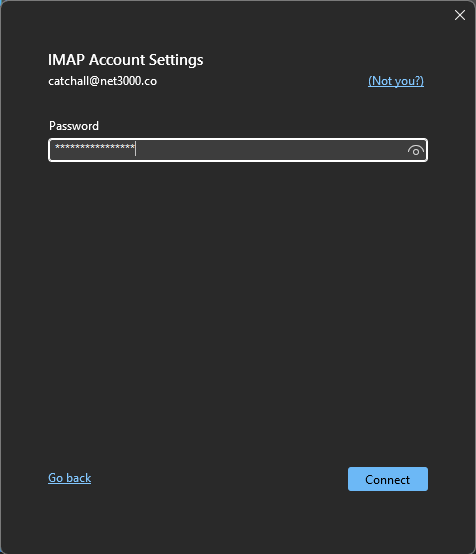
Step 8. Enter your new mailbox password and click Connect. Outlook detects the server settings automatically, and your new account appears in the folder list on the left. If you are asked to enter the settings manually, use the Net3000 Managed Email settings listed near the top of this guide.
Part 3 — Import your saved mail into the new mailbox
Step 9. Click File, then Open & Export, then Import/Export again — the same menu you used in Step 1.
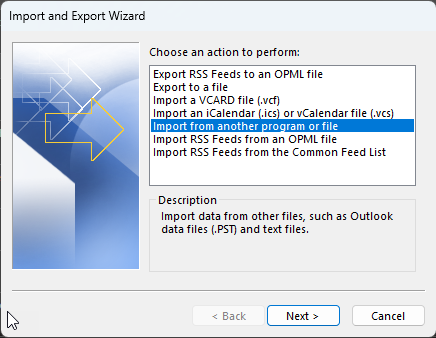
Step 10. Choose Import from another program or file, then click Next.
Step 11. Select Outlook Data File (.pst), then click Next.
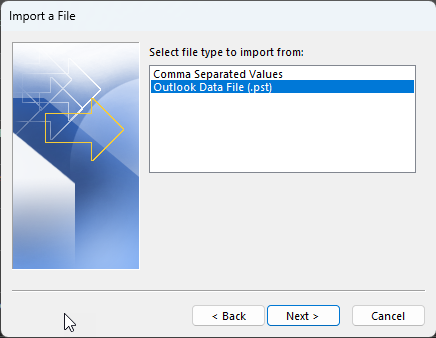
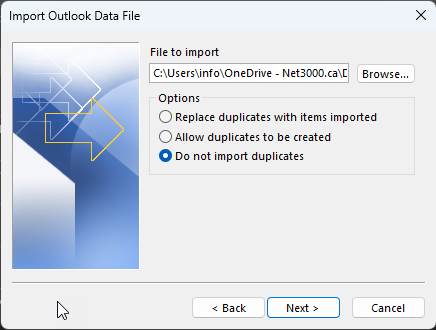
Step 12. Click Browse and select the backup.pst file you saved in Part 1. Choose Do not import duplicates, then click Next.
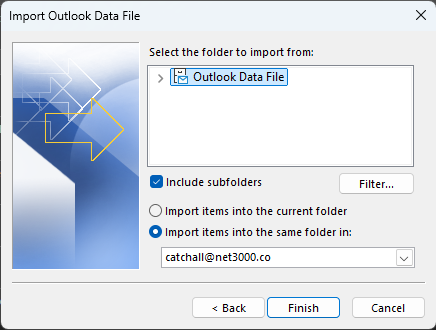
Step 13. Click the top folder and tick Include subfolders. Select Import items into the same folder in: and choose your new email account from the drop-down (not “Personal Folders”). Click Finish.
Outlook now copies your mail into the new account and uploads it to the server. This can take a while for large mailboxes — leave Outlook open and connected until the folders stop showing “updating”. To confirm everything arrived, sign in to your webmail at https://mailman.net3000.ca and check your folders.
Need a hand? Open a support ticket from your Net3000 dashboard and we will help you complete the move.